With only a few API calls and within a matter of minutes, you can set up and play your first stream on a customizable webpage hosted by Wowza Video™.
This tutorial walks you through using the Wowza Video REST API to deliver a stream from a video source to a player on a hosted page. You'll use a camera to capture a video stream that's pushed to the Wowza Video service for processing, and then the highest quality stream for each viewer's bandwidth is delivered to the player. Wowza Video handles the entire streaming and viewing experience.
And so you can integrate the full streaming workflow into your code-based solution, you'll learn how to programmatically start and stop your stream.
Before you start
This tutorial uses:
- A JSON Web Token (JWT) for a Wowza Video account. If you don't have an account and want to use the free trial, see Wowza Video free trial for more information including trial limitations.
- cURL, Postman, or another REST API client to make calls to the Wowza Video REST API. For information about installing and using your REST API client, refer to their documentation.
Tips for working through this tutorial:
- Sample code — We use environment variables for your JWT in the cURL API request examples in this tutorial to make it easier for you to copy, paste, and run commands in your Terminal or Command Prompt window. After you get your JWT in step 1, you can set the environment variable on your computer so you don't have to manually replace the variablesin the sample code. See Tools for testing the API for instructions.
If you don't set environment variable for these values, you'll need to manually enter the correct value in the code samples throughout this tutorial. - Learning more about the API — We've provided working code samples throughout this tutorial that you can execute as presented. However, you should explore the full API reference documentation to learn about the other objects and values you can use to customize requests.
We've made it easy for you to do that exploration by providing a link to the API reference documentation before each request sample.
1. Get your access token
You'll use an access token, also called a JSON Web Token, to authenticate yourself when you make calls to the REST API. The token identifies the Wowza Video account and specific user making the API requests.
There are two types of access tokens:
- Personal access tokens — Available to all users with a Wowza Video license. These tokens are specific to a user and can be used in API calls to do quick tests or manual actions that don't need to persist if the user leaves the organization.
- System access tokens — Available to organization owners. These tokens are specific to the organization and transcend individual users who come into and leave an organization. For this reason, system access tokens are best used for integrations that go into production environments and need to persist after specific users leave an organization.
Generate the token in the Wowza Video user interface.
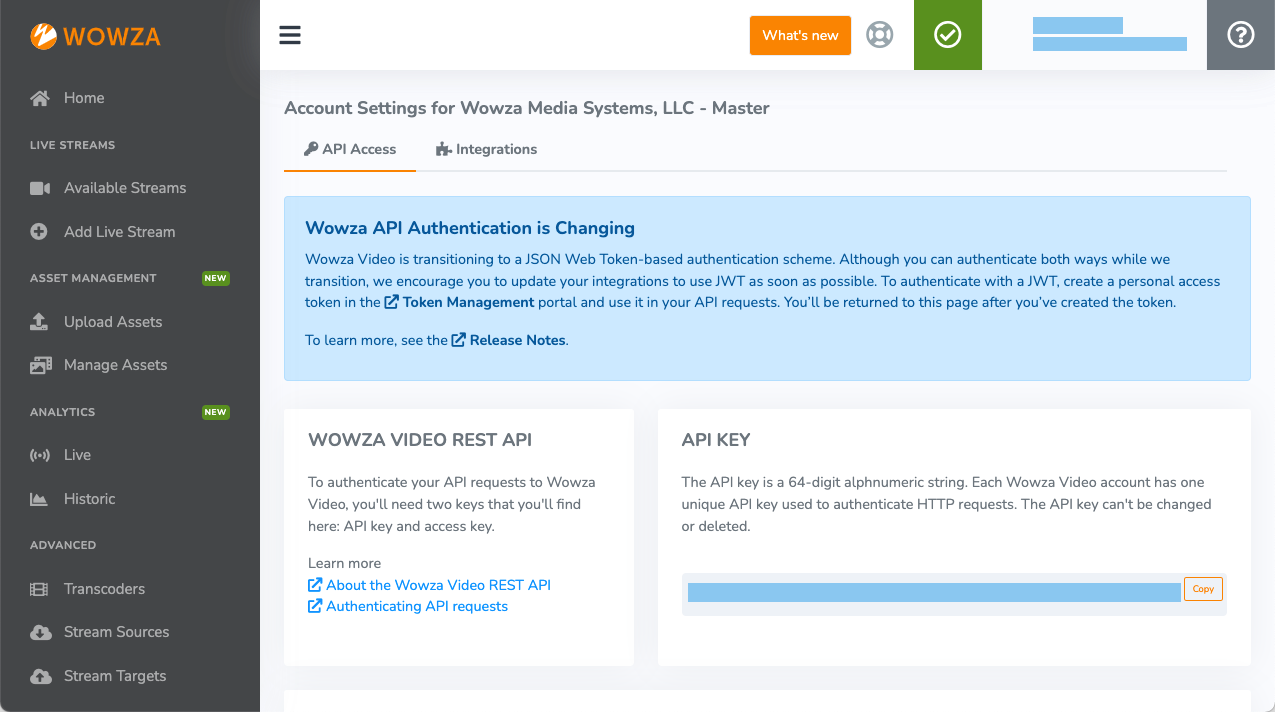
- In the menu bar, click your user name and choose Account Settings.
- Make sure you're on the API Access tab, and then click Token Management in the Wowza API Authentication is Changing banner.
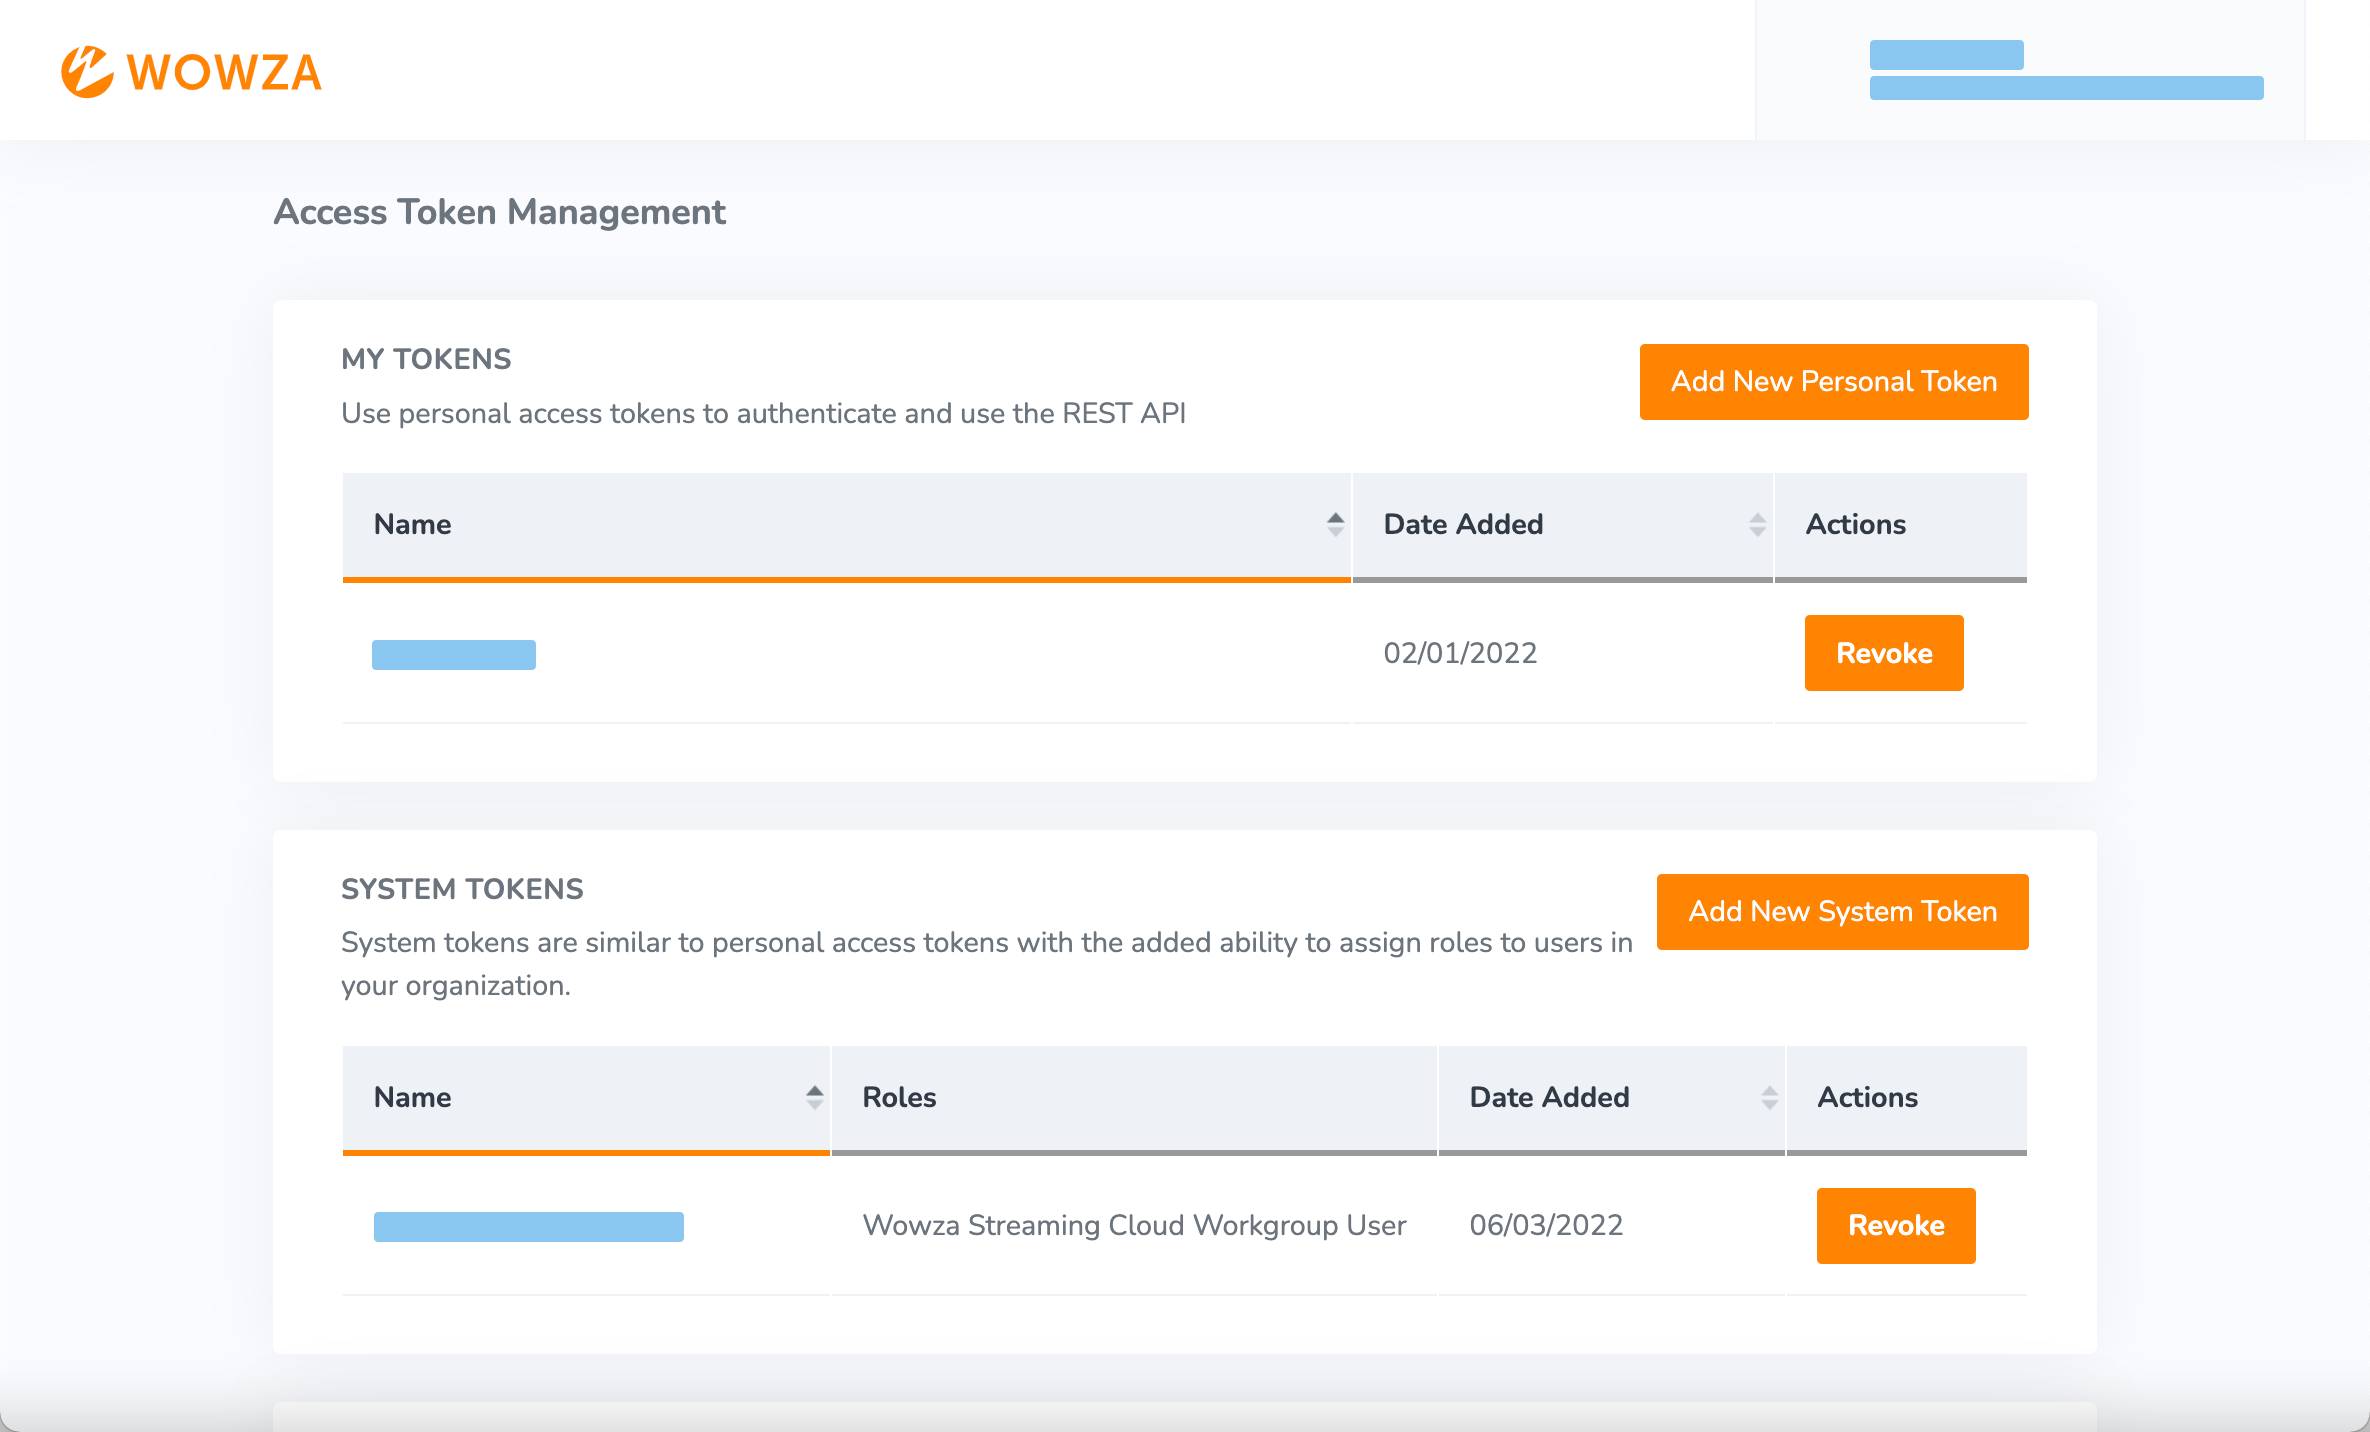
- In the Token Management portal, add a new token. Choose a personal access token or, if you're an organization owner, a system token. If you're an organization member who needs a system-level token that needs to persists, reach out to your organization owner.
Make sure you copy the token and store it in a safe location; you won't see the token again later.
2. Create a live stream
The quickest way to your first broadcast is with a live stream. In Wowza Video, a live stream automatically handles a lot of the configuration and processing necessary to provide your stream to a global audience.
In a single API call, you'll:
- specify how the video connects with Wowza Video
- set up a webpage hosted by Wowza that you'll send your viewers to
- configure the generated player, embedded in the hosted page, that viewers will use to watch the stream
To create a live stream that receives a WebRTC source, generates a player, and configures a hosted page, copy the following sample code and send it as a POST request, using cURL or Postman, to the /live_streams endpoint.
Tip: See Tools for testing the API for more information about using a REST API client to send requests.
For the purpose of this tutorial, you can use the sample code below as it is, with the following changes:
- Replace ${WV_JWT} with the value you noted in the previous step. If you've set your environment variables for this value, as suggested in the Before you start section, you don't have to make any changes.
Sample request
curl -X POST \
-H "Content-Type: application/json" \
-H "Authorization: Bearer ${WV_JWT}" \
-d '{
   "live_stream": {
     "aspect_ratio_height": 720,
     "aspect_ratio_width": 1280,
     "billing_mode": "pay_as_you_go",
     "broadcast_location": "us_west_california",
     "delivery_method": "push",
     "encoder": "other_webrtc",
     "name": "MyLiveStream",
     "transcoder_type": "transcoded"
   }
}' "https://api.video.wowza.com/api/v1.10/live_streams"
Sample response
The response includes:
- An ID that identifies the live stream. You'll use this ID in later steps to complete actions on the live stream.
- Source connection information that you'll use to configure the WebRTC publish page as the source for the live stream. You'll complete this configuration in the next step.
- Information about the hosted page and player that will be generated. We didn't explicitly include configuration details for the hosted page or the player in the request, instead, we relied on the default values. If unspecified:
- The default value for enabled in the hosted_page object is true.
- The default value for type in the player object is wowza_flowplayer for Wowza Video subscribers or original_html5 for other subscribers.
Note: You're a Wowza Video subscriber if you have access to Asset Management and Historic and Live Analytics in the Wowza Video user interface.
- Other details of the live stream's configuration.
{
   "live_stream": {
     "id": "1234abcd",
     "name": "MyWebRTCStream",
     ...
     "encoder": "other_webrtc",
     ...
     "source_connection_information": {
         "sdp_url": "wss://[subdomain].entrypoint.video.wowza.com/webrtc-session.json",
         "application_name": "app-30zl5349",
         "stream_name": "32a5814b"
     },
     "player": {
         "id": "rjlwfsvl",
         "type": "wowza_flowplayer",
         "responsive": false,
         "width": 640,
         ...
          }
     "hosted_page": {
         "enabled": true,
         "title": "Hosted player page",
         "url": "https://player.video.wowza.com/qa/g7xr79xw/player.html",
         "sharing_icons": true,
         ...
          }
   }
}
Now that you've created a live stream in Wowza Video to receive and process the WebRTC video source, you can configure your video source and connect it to Wowza Video.
3. Configure your video source
Use the source_connection_information from the live stream response to configure the WebRTC publish page as your video source. WebRTC lets you capture video from your browser without installing plug-ins or downloading third-party software.
- In a new browser tab, go to wowza.com/webrtc/publish. Grant access to your camera and microphone when prompted.
Note: The WebRTC hosted publish page is supported on the latest versions of Chrome and Safari, as well as Edge version 79 and later.
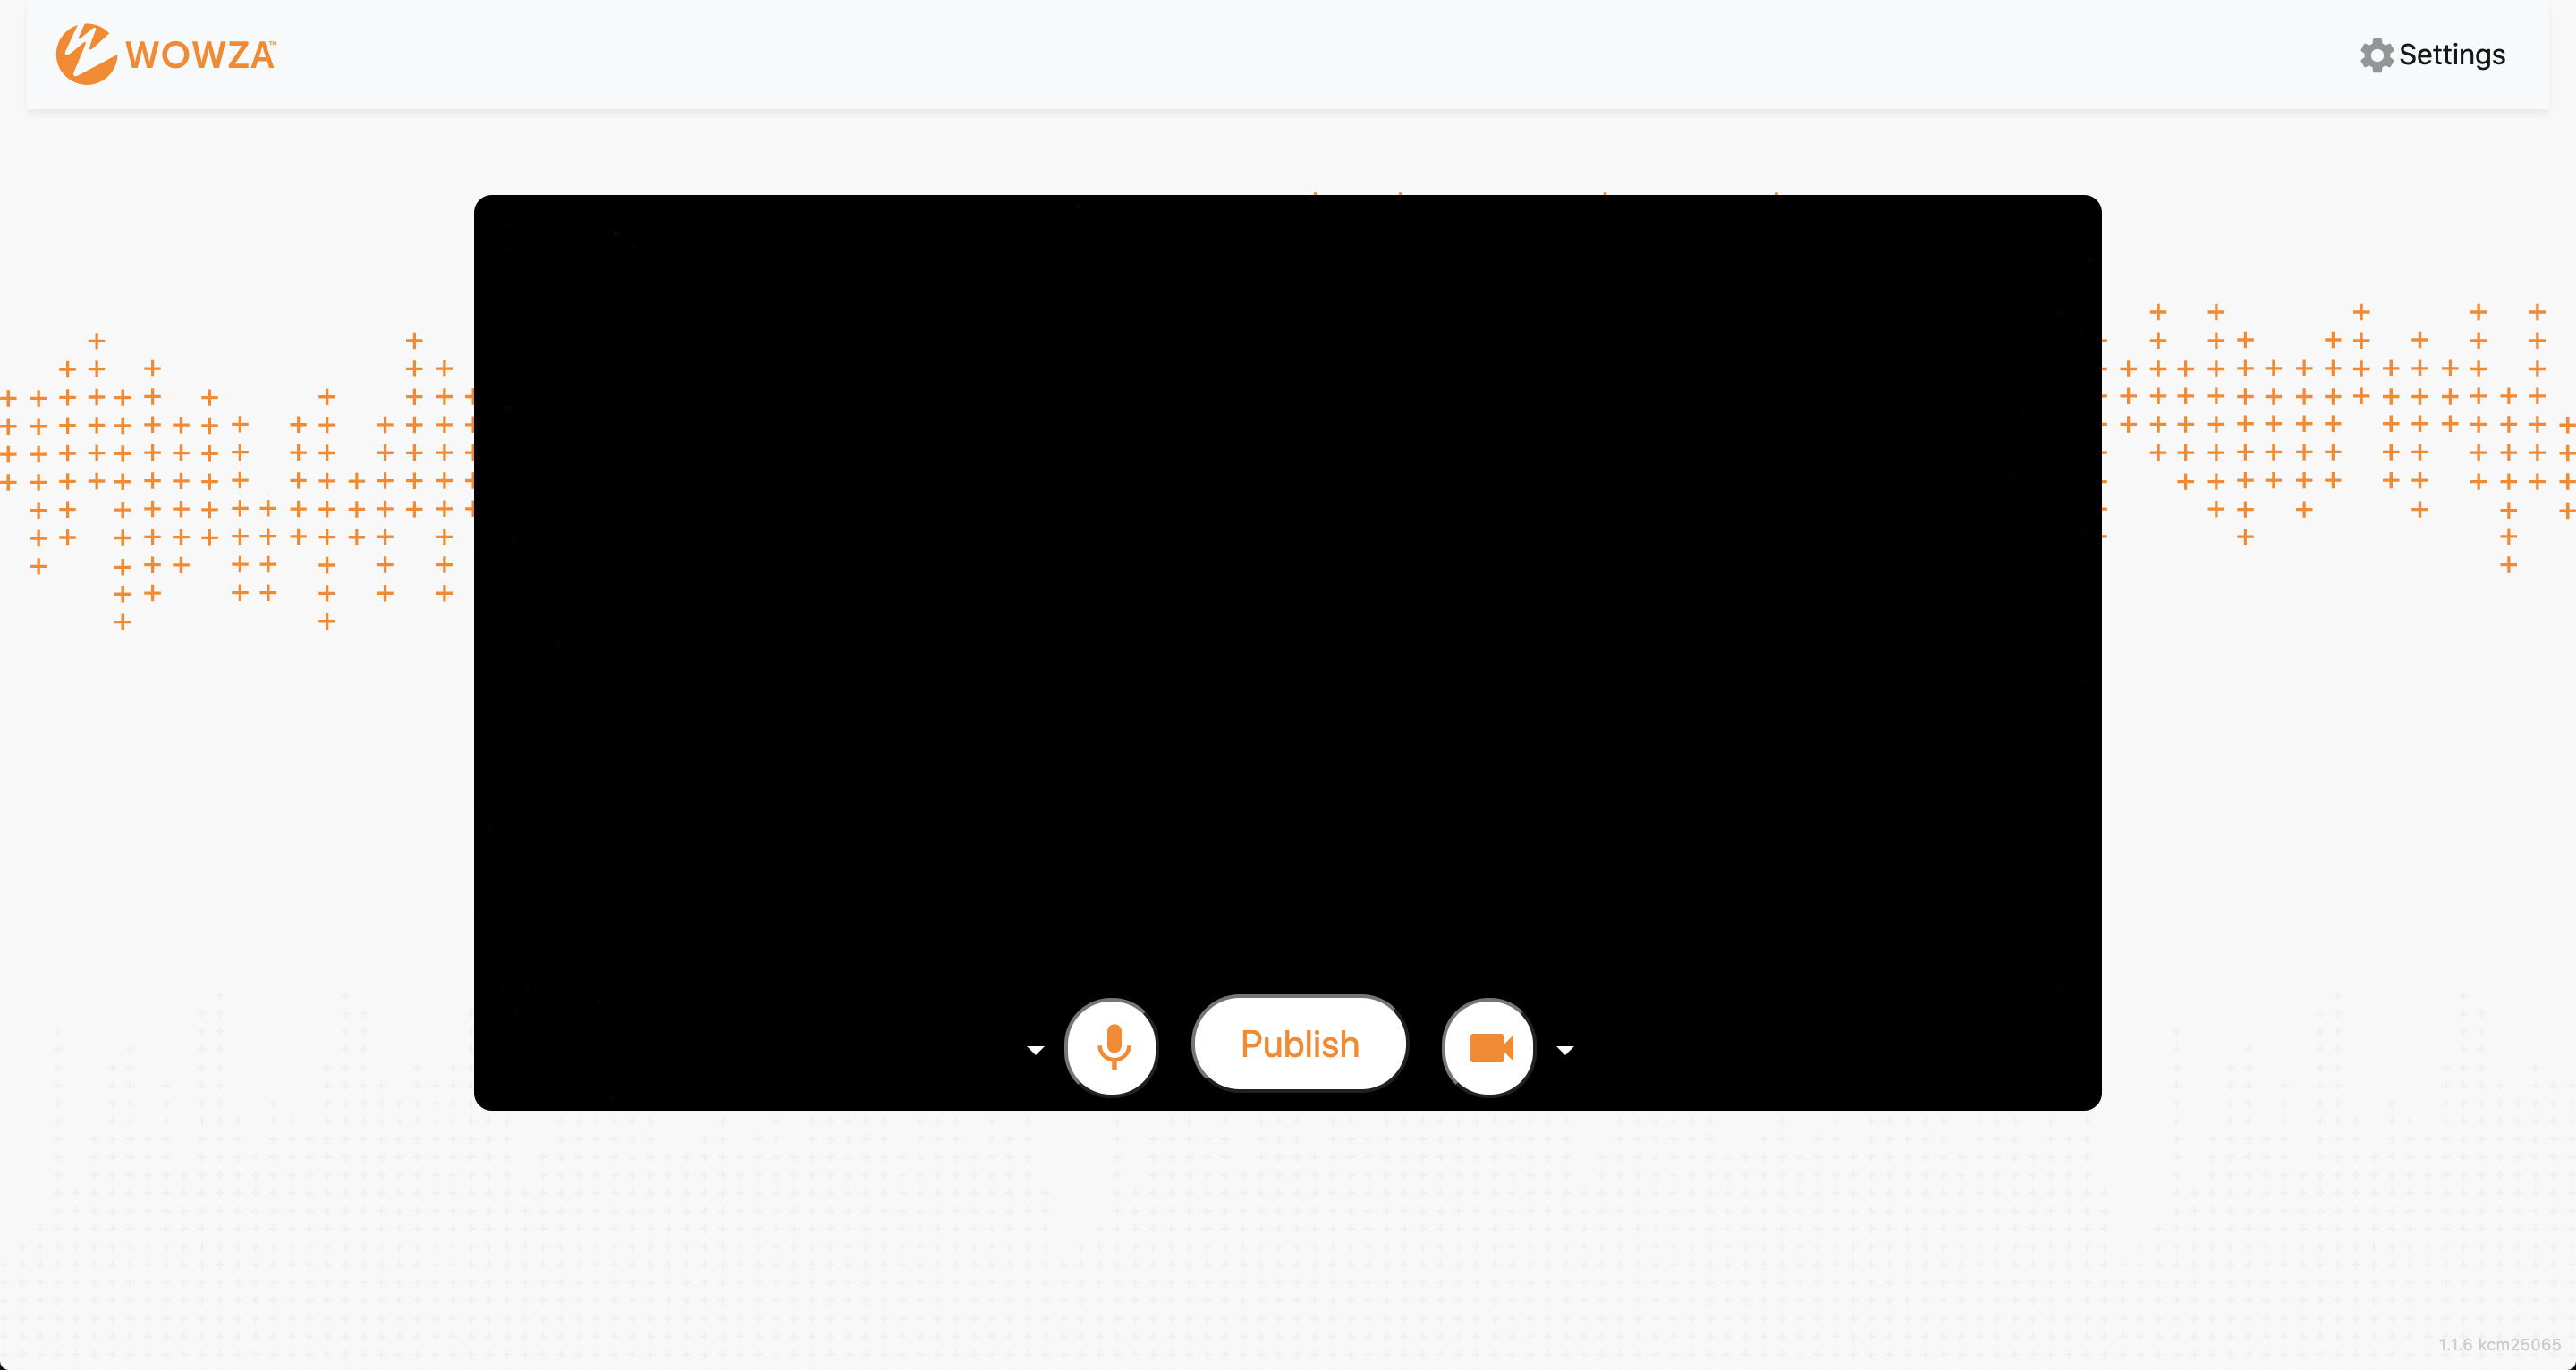
- Click the Settings button on the upper-right corner of the page.
- Using the source_connection_information from the response returned when you created the live stream, as seen below, enter the following information:
Example from REST API response"source_connection_information": { "sdp_url": "wss://[subdomain].entrypoint.video.wowza.com/webrtc-session.json", "application_name": "app-30zl5349", "stream_name": "32a5814b" }- Enter the sdp_url value in the SDP URL field.
- Enter the application_name value in the Application Name field.
- Enter the stream_name value in the Stream Name field.
- Leave Audio Bitrate and Video Bitrate set to the default values.
- Close the Settings dialog box to apply your changes.
Now that you've configured your video source, you'll start the live stream in Wowza Video first so it's ready to process the incoming video, then you'll start the stream on the WebRTC publish page.
4. Start the live stream
After the live stream is created and the source is configured, start the stream in Wowza Video and on the WebRTC publish page. Wowza Video processes the stream coming from the publish page and sends it to the player for viewing on the hosted page.
Note: For active subscriptions, charges start accruing when you start the stream in Wowza Video. See Wowza Video free trial for trial subscription features and limitations.
4a. Start in Wowza Video
To start the live stream in Wowza Video, copy the following sample code and send it as a PUT request to the /live_streams/[live_stream_id]/start endpoint with the following change:
- Replace [live_stream_id] with the ID returned in step 2.
Sample request
curl -X PUT \
-H "Content-Type: application/json" \
-H "Authorization: Bearer ${WV_JWT}" \
"https://api.video.wowza.com/api/v1.10/live_streams/[live_stream_id]/start"
The response displays the state of the live stream. In this case, starting.
4b. Start on the WebRTC publish page
To make sure the live stream has time to complete the start up process, wait 20 seconds and then click Publish on the WebRTC publish page.
The stream has started at your video source and Wowza Video is receiving, processing, and delivering the stream to the player on your hosted page. In the next step, you'll retrieve the URL for the hosted page and see the stream playing on it.
5. View the stream
When you created the live stream in step 2, the response showed the url parameter value in the hosted_page object as in_progress, instead of providing a URL to the hosted page. The hosted page and player aren't instantly available because Wowza Video generates them after receiving the POST live_stream request.
To retrieve the hosted page URL now, copy the following sample code and send it as a GET request to the /live_streams/[live_stream_id] endpoint with the following change:
- Replace [live_stream_id] with the ID returned in step 2.
Sample request
curl -X GET \
-H "Authorization: Bearer ${WV_JWT}" \
"https://api.video.wowza.com/api/v1.10/live_streams/[live_stream_id]"
The response includes url, in the hosted_page object formatted similarly to https://player.video.wowza.com/hosted/[page_id]/player.html. This is the URL that you'll distribute to your viewers.
Enter the URL into a browser to open the hosted page, click the play button, and view the live stream. While you're the only one viewing your stream now, this same URL could be used by hundreds or hundreds of thousands of viewers.
6. Stop the live stream
After viewing the live stream on the hosted page, stop the stream. Make sure you stop both the video source and the stream in Wowza Video. If you forget to stop the stream in Wowza Video, you'll continue to accrue charges.
Note: When you have an active subscription, transcoding charges accrue for started live streams even if they aren't actively streaming content. Wowza Video automatically stops idle live streams after 20 minutes, but you should stop your stream as soon as your event ends to avoid accruing unnecessary charges.
See Wowza Video free trial for trial subscription features and limitations.
6a. Stop on the WebRTC publish page
On the WebRTC publish page, click Stop.
6b. Stop in Wowza Video
To stop the live stream, copy the following sample code and send it as a PUT request to the /live_streams/[live_stream_id]/stop endpoint with the following change:
- Replace [live_stream_id] with the ID returned in step 2.
Sample request
curl -X PUT \
-H "Authorization: Bearer ${WV_JWT}" \
"https://api.video.wowza.com/api/v1.10/live_streams/[live_stream_id]/stop"
The response displays the state of the live stream. In this case, stopped.
Next steps
You've completed your first live stream! You used an encoder (WebRTC) to send video to Wowza Video where it was processed and then delivered to your viewers.
You can now move on to learn how to query a live stream and get useful information about one or more live streams that you can use to build a robust code-based streaming solution. Or you can explore the articles in the General examples section of the navigation to move on to advanced REST API tasks.